


GitLabをインストールし、いざCI/CD機能を利用しようとしたところ、次のエラーメッセージが表示されました。
This job is stuck because you don't have any active runners that can run this job.

Go to project CI settings
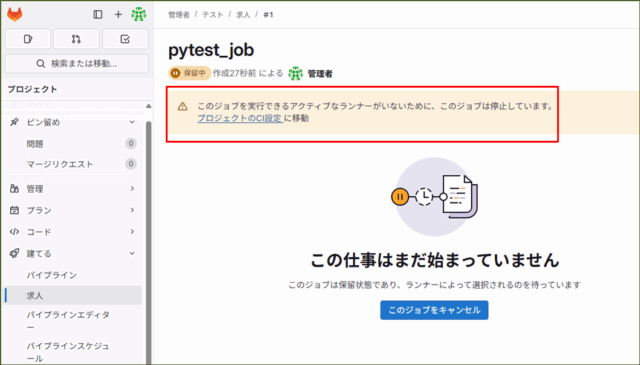
公式ドキュメントを見ると、パイプラインでジョブを実行するにはGitLab Runnerのインストールが必須とのことです。
この記事では、以前投稿した「Amazon EC2を利用してGitLabサーバを構築してみた」を前提に、Ubuntu上で稼働するGitLabにGitLab Runnerを導入し、CI/CD環境を構築する手順をご紹介します。
GitLab Runnerインストールしてみた
■準備
GitLab Runnerをインストールしたあとに、パイプライン実行する際に実行環境としてDockerを利用するため、Dockerをインストールします。
次のコマンドはAIに聞いた内容なので、適宜実行してください。
【コマンド】
# 依存関係のインストール
sudo apt-get update
sudo apt-get install -y \
    apt-transport-https \
    ca-certificates \
    curl \
    gnupg \
    lsb-release

# Docker 公式 GPG キー追加
curl -fsSL https://download.docker.com/linux/ubuntu/gpg | sudo gpg --dearmor -o /usr/share/keyrings/docker-archive-keyring.gpg

# リポジトリ登録
echo \
  "deb [arch=$(dpkg --print-architecture) signed-by=/usr/share/keyrings/docker-archive-keyring.gpg] \
  https://download.docker.com/linux/ubuntu \
  $(lsb_release -cs) stable" \
  | sudo tee /etc/apt/sources.list.d/docker.list > /dev/null

# Docker Engine と CLI のインストール
sudo apt-get update
sudo apt-get install -y docker-ce docker-ce-cli containerd.io
■GitLab Runnerインストール
それでは、GitLabサーバにGitLab Runnerをインストールします。サーバにログインし、次のコマンドを実行します。
【コマンド】
# apt リポジトリ登録
curl -L https://packages.gitlab.com/install/repositories/runner/gitlab-runner/script.deb.sh | sudo bash

# GitLab Runner本体インストール
sudo apt-get install gitlab-runner
【実行結果】
root@ip-10-0-9-207:~# curl -L https://packages.gitlab.com/install/repositories/runner/gitlab-runner/script.deb.sh | sudo bash
  % Total    % Received % Xferd  Average Speed   Time    Time     Time  Current
                                 Dload  Upload   Total   Spent    Left  Speed
100  6885  100  6885    0     0  22198      0 --:--:-- --:--:-- --:--:-- 22209
Detected operating system as Ubuntu/noble.
Checking for curl...
Detected curl...
Checking for gpg...
Detected gpg...
Running apt-get update... done.
Installing apt-transport-https... done.
Installing /etc/apt/sources.list.d/runner_gitlab-runner.list...done.
Importing packagecloud gpg key... done.
Running apt-get update... done.

The repository is setup! You can now install packages.
root@ip-10-0-9-207:~# sudo apt-get install gitlab-runner
Reading package lists... Done
Building dependency tree... Done
Reading state information... Done
The following additional packages will be installed:
  gitlab-runner-helper-images
Suggested packages:
  docker-engine
The following NEW packages will be installed:
  gitlab-runner gitlab-runner-helper-images
0 upgraded, 2 newly installed, 0 to remove and 51 not upgraded.
Need to get 535 MB of archives.
After this operation, 618 MB of additional disk space will be used.
Do you want to continue? [Y/n] Y
Get:1 https://packages.gitlab.com/runner/gitlab-runner/ubuntu noble/main amd64 gitlab-runner-helper-images all 18.1.1-1 [508 MB]
Get:2 https://packages.gitlab.com/runner/gitlab-runner/ubuntu noble/main amd64 gitlab-runner amd64 18.1.1-1 [27.1 MB]
Fetched 535 MB in 7s (77.4 MB/s)
Selecting previously unselected package gitlab-runner-helper-images.
(Reading database ... 189574 files and directories currently installed.)
Preparing to unpack .../gitlab-runner-helper-images_18.1.1-1_all.deb ...
Unpacking gitlab-runner-helper-images (18.1.1-1) ...
Selecting previously unselected package gitlab-runner.
Preparing to unpack .../gitlab-runner_18.1.1-1_amd64.deb ...
Unpacking gitlab-runner (18.1.1-1) ...
Setting up gitlab-runner-helper-images (18.1.1-1) ...
Setting up gitlab-runner (18.1.1-1) ...
GitLab Runner: creating gitlab-runner...
Home directory skeleton not used
Runtime platform                                    arch=amd64 os=linux pid=24988 revision=2b813ade version=18.1.1
gitlab-runner: the service is not installed
Runtime platform                                    arch=amd64 os=linux pid=24997 revision=2b813ade version=18.1.1
gitlab-ci-multi-runner: the service is not installed
Runtime platform                                    arch=amd64 os=linux pid=25021 revision=2b813ade version=18.1.1
Runtime platform                                    arch=amd64 os=linux pid=25133 revision=2b813ade version=18.1.1

Check and remove all unused containers (both dangling and unreferenced)
-----------------------------------------------------------------------
Total reclaimed space: 0B
Scanning processes...
Scanning linux images...

Running kernel seems to be up-to-date.

No services need to be restarted.

No containers need to be restarted.

No user sessions are running outdated binaries.

No VM guests are running outdated hypervisor (qemu) binaries on this host.
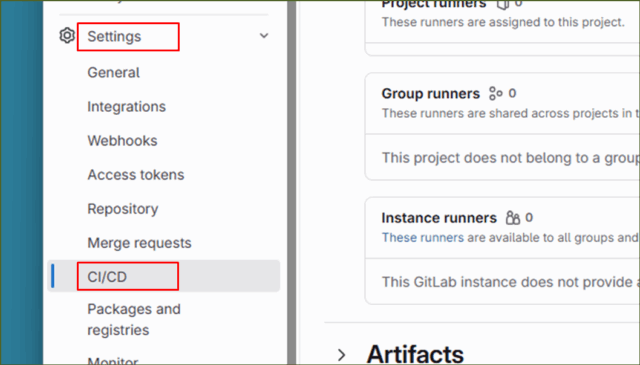
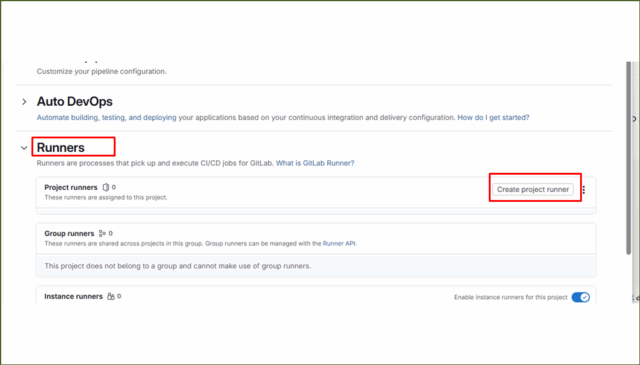
次にGitLabのWeb UIで、Runnerの登録を行います。
↓[ Settings ] ⇒ [ CI/CD ] ⇒ [ Runner ] ⇒ [ Create project runner ]を押下します。
↓
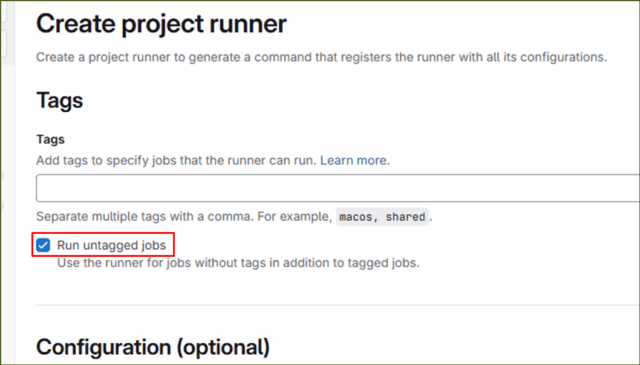
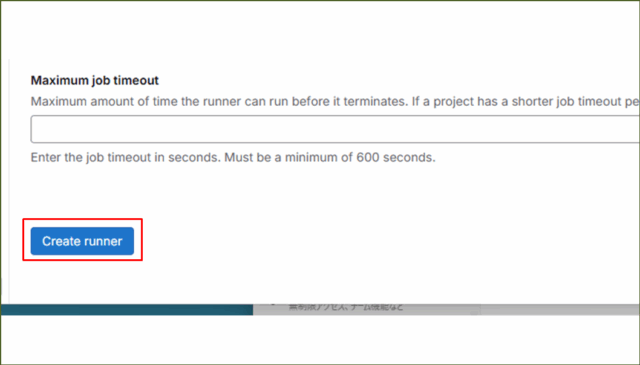
[ Run untagged jobs ]にチェックを入れ、それ以外はそのままで[ Create runner ]を押下します。
↓
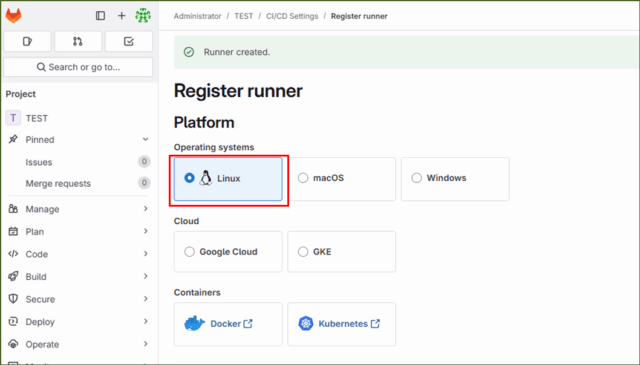
サーバ側でGitLab Runnerを登録するステップが書かれた、[ Register runner ]のページに遷移しますので、ステップごとに実施します。
今回利用しているGitLabサーバはubuntu上で動作していますので、[ Operating systems ]を[ Linux ]で選択します。
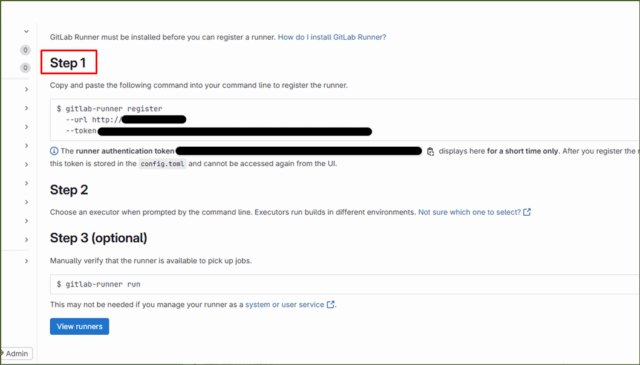
続いて、[ Step 1 ]で書かれたコマンドを、サーバ上で実行します。
【実行結果】※一部マスキングしています。
root@ip-10-0-9-207:~# gitlab-runner register  --url http://<あなたのGitLabサーバIPアドレス>"  --<runner作成時に表示されたトークン>
Runtime platform                                    arch=amd64 os=linux pid=36303 revision=2b813ade version=18
.1.1
WARNING: Running in user-mode.
WARNING: The user-mode requires you to manually start builds processing:
WARNING: $ gitlab-runner run
WARNING: Use sudo for system-mode:
WARNING: $ sudo gitlab-runner...

Created missing unique system ID                    system_id=s_e968edb0afe3
Enter the GitLab instance URL (for example, https://gitlab.com/):
コマンドを実行すると、対話式でいくつか聞かれます。
URLに間違いがなければ、[ Enter ]を押下します。
【実行結果】
Enter the GitLab instance URL (for example, https://gitlab.com/):
[http://<あなたのGitLabサーバのURL>]:
Runnerの名前は特に指定しませんので、そのまま[ Enter ]を押下します。
【実行結果】
Enter a name for the runner. This is stored only in the local config.toml file:
[ip-10-0-13-181]:
実行プログラムが聞かれます。手軽なshellでも問題ないですが、今回は環境を隔離できる[ docker ]を選択します。
【実行結果】
Enter an executor: parallels, docker, kubernetes, docker-autoscaler, instance, shell, ssh, virtualbox, docker-windows,
docker+machine, custom:
docker
デフォルトのDockerイメージは、例で書かれている[ ruby:2.7 ]を入力します。なにを指定しても大丈夫です。
【実行結果】
Enter the default Docker image (for example, ruby:2.7):
ruby:2.7
Runner registered successfully. Feel free to start it, but if it's running already the config should be automatically r
eloaded!
Configuration (with the authentication token) was saved in "/home/ubuntu/.gitlab-runner/config.toml"
さいごに、GitLab Runnerが動いているか見ておきます。
【コマンド】
sudo systemctl restart gitlab-runner
sudo systemctl status gitlab-runner
【実行結果】
root@ip-10-0-9-207:~# sudo systemctl status gitlab-runner
● gitlab-runner.service - GitLab Runner
     Loaded: loaded (/etc/systemd/system/gitlab-runner.service; enabled; vendor preset: enabled)
     Active: active (running) since Sat 2025-07-12 06:31:08 UTC; 35min ago
   Main PID: 34787 (gitlab-runner)
      Tasks: 8 (limit: 9252)
     Memory: 23.3M
        CPU: 445ms
     CGroup: /system.slice/gitlab-runner.service
             └─34787 /usr/bin/gitlab-runner run --config /etc/gitlab-runner/config.toml --working-directory /home/gitlab-runne>
すでに動作していて、かつサーバ起動時にサービスがスタートするように[ enabled ]の設定もされていますね。
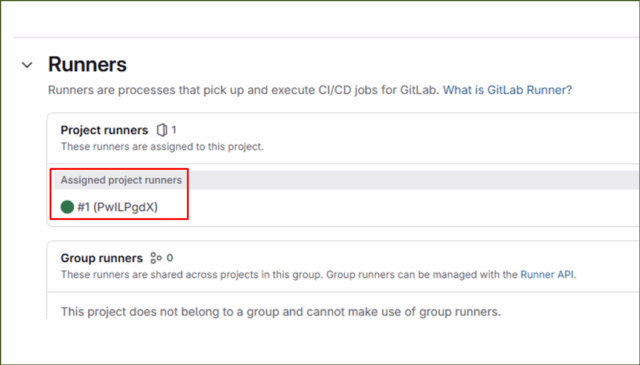
Web UIでRunnerを見てみると、三角マークから緑色の丸に代わっており、[ Assigned project runners ]と表示されております、無事に登録されたようですね。
■グループ追加
GitLab Runnerをインストールしましたが、このままでは実行環境として利用するDockerを起動できません。gitlab-runnerユーザーをdockerグループに追加します。
まずは現在のgitlab-runnerユーザーで docker psが通るかテストしてみます。
【コマンド】
sudo -u gitlab-runner docker ps
【実行結果】
root@ip-10-0-9-207:~# sudo -u gitlab-runner docker ps
permission denied while trying to connect to the Docker daemon socket at unix:///var/run/docker.sock: Get "http://%2Fvar%2Frun%2Fdocker.sock/v1.51/containers/json": dial unix /var/run/docker.sock: connect: permission denied
デフォルトではgitlab-runnerユーザーがDockerグループに入っていないため、コンテナ起動権限がありません。つづいて、以下のコマンドを実行してください。
【コマンド】
sudo usermod -aG docker gitlab-runner
【実行結果】
root@ip-10-0-9-207:~# sudo usermod -aG docker gitlab-runner
root@ip-10-0-9-207:~# sudo -u gitlab-runner docker ps
CONTAINER ID   IMAGE     COMMAND   CREATED   STATUS    PORTS     NAMES
ここでエラーなくコンテナ一覧が表示されれば準備完了です。
■動作確認
GitLab Runnerのインストールが完了しましたので、CI/CD機能を利用してみます。パイプラインをテストするように、3つのコードを用意しました。3ファイルを同階層に配置してください。
- calculator.py
- test_calculator.py
- .gitlab-ci.yml
calculator.py
# calculator.py

def add(a, b):
    """a + b を返す"""
    return a + b

def subtract(a, b):
    """a - b を返す"""
    return a - b

def multiply(a, b):
    """a * b を返す"""
    return a * b

def divide(a, b):
    """a / b を返す。b が 0 の場合は ValueError を送出"""
    if b == 0:
        raise ValueError("Cannot divide by zero.")
    return a / b
test_calculator.py
# test_calculator.py
import pytest
from calculator import add, subtract, multiply, divide

def test_add():
    assert add(3, 2) == 5

def test_subtract():
    assert subtract(5, 3) == 2

def test_multiply():
    assert multiply(4, 2) == 8

def test_divide():
    assert divide(10, 2) == 5

def test_divide_by_zero():
    with pytest.raises(ValueError):
        divide(10, 0)
.gitlab-ci.yml
# .gitlab-ci.yml

stages:
  - test

variables:
  PIP_CACHE_DIR: "$CI_PROJECT_DIR/.cache/pip"

cache:
  paths:
    - .cache/pip

pytest_job:
  stage: test
  image: python:3.9
  before_script:
    - pip install --upgrade pip
    - pip install pytest
  script:
    - pytest test_calculator.py --maxfail=1 --disable-warnings --junitxml=report.xml
  artifacts:
    when: always
    reports:
      junit: report.xml
    paths:
      - report.xml
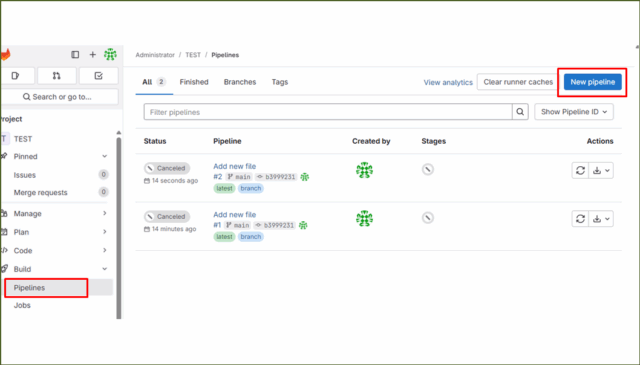
配置が完了したら、パイプラインを実行し、ジョブを確認していきます。
↓Web UIから[ Build ]⇒[ Pipelines ]⇒[ New Pipeline ]を押下してください。
↓
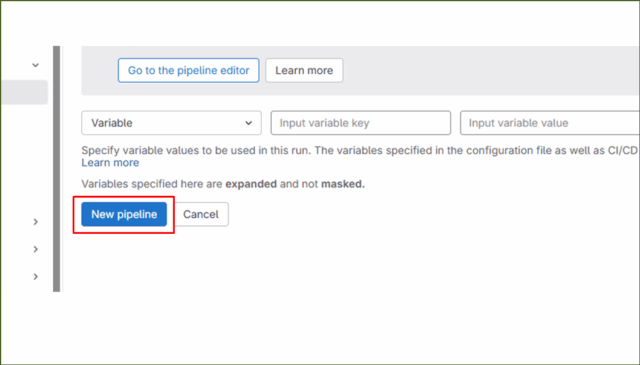
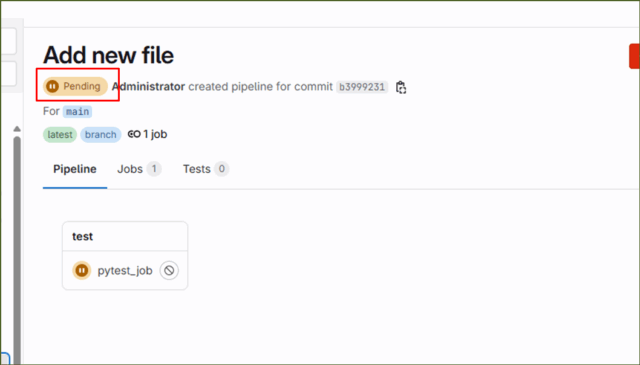
作成と同時に、ジョブが動き出しています。
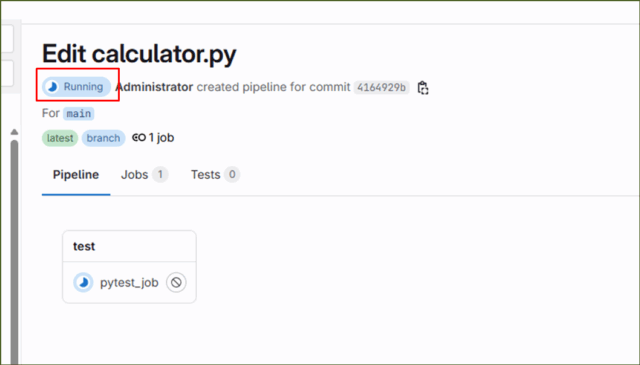
↓Runnerがインストールされていない場合、pendingとなり、デフォルトのタイムアウトまで保留となっていました。しかし、今回はRunningとなり、無事に.gitlab-ci.ymlに記述されている内容が実行されていそうです。
↓
↓少し待つと、パイプラインのステータスが"Passed"となりました。
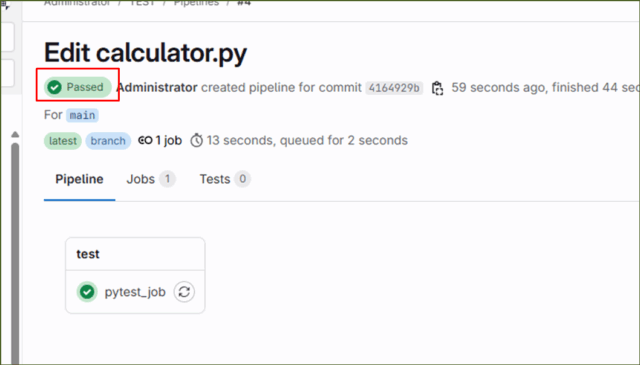
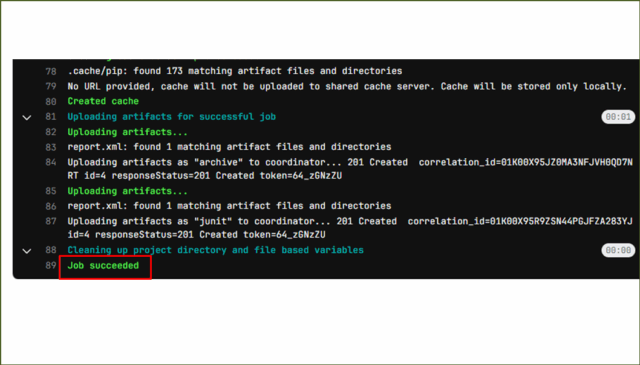
↓個々のジョブの詳細を見るために、"pytest_job"をクリックしてみると、次のように処理が成功していることがわかります。
GitLab Runnerのインストールは以上です。
まとめ
GitLabをリモートリポジトリとしてだけ使う場合はサーバーを立てるだけで問題ありません。しかし、CI/CD機能をフル活用するにはGitLab Runnerの導入が不可欠です。
公式ドキュメントを見ると、OSや実行環境ごとに手順が複数あり、どれを選べばよいか戸惑いがちです。
本記事ではUbuntu上でGitLabを運用している前提で、Runnerのインストールから設定までを紹介しました。
これでテストやビルドの自動化が簡単に実現でき、GitLabのCI/CD機能を最大限に活用できます。
参考リンク:GitLab日本語マニュアル
↓ほかの協栄情報メンバーもGitLabについての記事を公開しています。ぜひ参考にしてみてください。
■Amazon EC2を利用して、GitLabサーバを構築してみた【AWS】(齊藤弘樹)